amana ptac troubleshooting manual
Amana PTAC Troubleshooting Manual: A Comprehensive Guide
Navigating Amana PTAC issues? This guide offers detailed troubleshooting, from fan problems and refrigerant concerns to electrical checks and model specifics—empowering informed decisions.
Understanding Amana PTAC Units
Amana Packaged Terminal Air Conditioners (PTACs) are self-contained heating and cooling systems commonly found in hotels, motels, apartments, and other multi-room buildings. Unlike central HVAC systems, PTACs operate independently, offering localized temperature control for each unit. They’re designed for through-wall installation, though some models can be adapted for window placement.

Understanding their categorization is key: many HVAC companies view smaller 9K BTU PTACs similarly to window or portable AC units, sometimes declining repairs due to profitability concerns, especially during peak seasons. This doesn’t reflect a fundamental flaw in the PTAC itself, but rather a business decision. These units, while robust, can often be economically repaired if you’re willing to tackle the troubleshooting yourself, utilizing service manuals and wiring diagrams readily available online for specific models.
PTAC Unit Categorization & Repair vs. Replacement
The decision to repair or replace an Amana PTAC often hinges on its categorization by HVAC professionals. Smaller units (like 9K BTU models) are frequently classified as “personal encased units,” leading some companies to prioritize replacement over repair, particularly during busy periods due to time and profit considerations. While replacements can range in cost, often being cheaper than larger PTACs but more expensive than window units, repair is frequently viable.
If you’re comfortable with DIY projects, accessing a service manual and wiring diagram for your specific model can empower you to diagnose and fix issues like fan malfunctions. However, refrigerant-related problems always necessitate a qualified technician. Carefully weigh the cost of repair parts against the price of a new unit, and consider a temporary personal AC solution while evaluating your options.
Locating Service Manuals & Wiring Diagrams
Successfully troubleshooting your Amana PTAC begins with accessing the correct documentation. A crucial first step is identifying your unit’s precise model number – this unlocks access to specific service manuals and wiring diagrams. These resources are invaluable for understanding the internal workings of your PTAC and pinpointing the source of any issues.
The internet is your primary resource; a targeted Google search using your model number (e.g., “Amana PTAC model XYZ service manual”) will often yield results. Manufacturers’ websites, online HVAC forums, and dedicated parts retailers are also excellent sources. Wiring diagrams are essential for safely diagnosing electrical problems, while service manuals provide detailed repair procedures and component locations. Remember to always prioritize safety when working with electrical appliances.
Troubleshooting Fan Issues
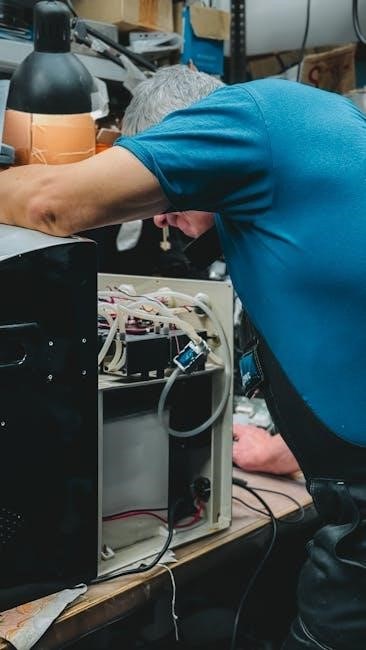
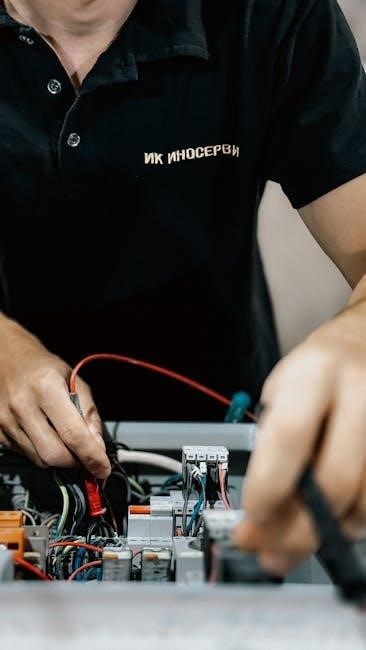
A common Amana PTAC problem is a malfunctioning fan. If your fan is cutting out, systematically investigate potential causes. Begin by inspecting the fan motor itself for any visible damage or obstructions. Next, carefully examine the capacitor – a frequent culprit – but remember it can retain a dangerous charge even after power-off, demanding extreme caution.
Further investigation should focus on the control board or relay responsible for powering the fan. Look for signs of burnt components or loose connections. A multimeter is invaluable for testing the capacitor and verifying voltage to the motor. Remember, HVAC companies often avoid PTAC repairs due to profitability, categorizing them as personal units, so DIY diagnosis can save costs.
Checking the Fan Motor
Begin by visually inspecting the fan motor for physical damage – cracks, broken blades, or debris obstructing its movement. Disconnect power before attempting any physical checks! Manually rotate the fan blade; it should spin freely without resistance. If it feels stiff or makes grinding noises, the motor bearings may be failing, indicating a need for replacement;
Using a multimeter, test the motor’s windings for continuity. A lack of continuity suggests an open winding and a faulty motor. Verify the voltage reaching the motor when the fan is supposed to be running. Low voltage could indicate a wiring issue or a problem with the control board. Remember, proper diagnosis requires careful observation and methodical testing.
Capacitor Safety & Testing
Capacitors store electrical energy, even after the unit is powered off, presenting a significant shock hazard. Always disconnect power and discharge the capacitor before handling it. Use a properly insulated screwdriver with an insulated handle to short across the capacitor terminals – this safely releases the stored charge. Visual inspection can reveal bulging or leaking, indicating failure.
To test a capacitor, use a multimeter with a capacitance function. Remove the capacitor from the circuit. The meter reading should be within 10% of the capacitor’s rated value (printed on the capacitor itself). A reading significantly outside this range indicates a faulty capacitor needing replacement. Exercise extreme caution; improper handling can be dangerous.
Board/Relay Inspection for Fan Control
If the fan intermittently fails or doesn’t operate, inspect the control board and associated relay for signs of damage. Look for burnt components, swollen capacitors, or cracked solder joints. A faulty relay can prevent power from reaching the fan motor, causing it to stop. Carefully examine the relay contacts for pitting or corrosion, which can impede current flow.
Use a multimeter to test the relay’s coil for continuity. If there’s no continuity, the relay is likely defective and needs replacement. Also, verify the board is receiving the correct voltage. A malfunctioning board can send incorrect signals, disrupting fan operation. Remember safety first – disconnect power before any inspection or testing!
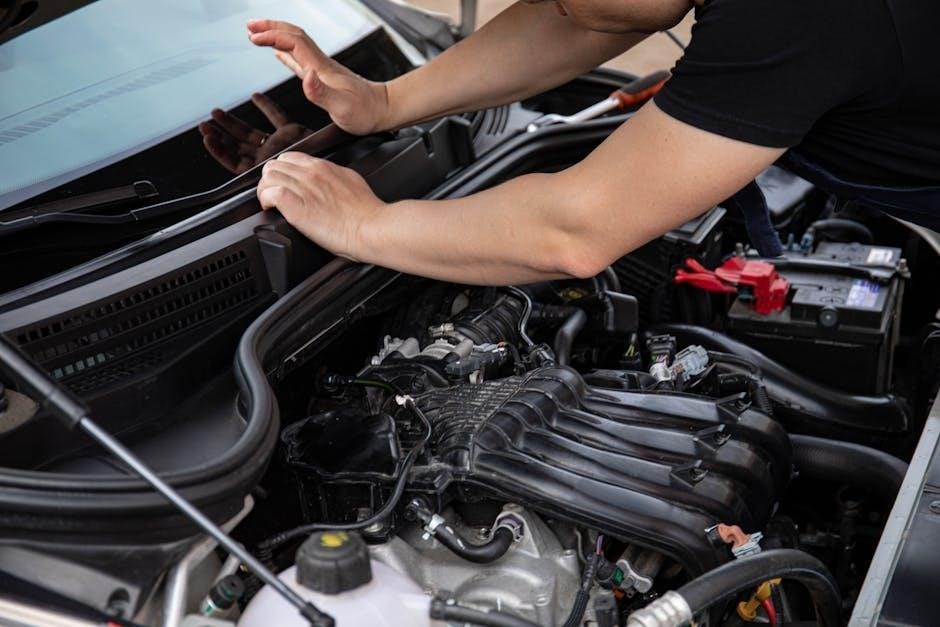
Refrigerant-Related Problems
Refrigerant issues require specialized knowledge and equipment; attempting DIY repairs can be dangerous and illegal. Signs of a refrigerant leak include insufficient cooling, ice buildup on the evaporator coil, or a hissing sound near the unit. Low refrigerant levels significantly reduce cooling capacity and can damage the compressor.
It’s crucial to call a qualified HVAC technician for diagnosis and repair. They possess the tools to accurately locate leaks, evacuate the system, and recharge it with the correct refrigerant type. If multiple technicians decline service, it might indicate significant internal damage, potentially justifying a replacement. Never attempt to handle refrigerant yourself – it’s harmful to the environment and your health.
When to Call a Professional for Refrigerant Issues
Refrigerant handling demands EPA certification and specialized tools; DIY attempts are illegal and potentially hazardous. Immediately contact a qualified HVAC technician if you suspect a leak – indicated by weak cooling, ice formation, or hissing sounds. A professional can accurately pinpoint the leak’s source using electronic leak detectors and pressure testing.
They’ll safely evacuate the system, repair the leak, and recharge it with the correct refrigerant, ensuring optimal performance and preventing further damage. If multiple technicians refuse service due to extensive damage, replacement becomes a more viable option. Prioritize safety and environmental responsibility; leave refrigerant work to the experts.
Compressor Operation in Heat Mode
Understanding compressor behavior during heating is crucial for diagnosis. Contrary to initial assumptions, the compressor should not be running continuously when the Amana PTAC unit is in heat mode – particularly for non-heat pump models. These units utilize electric resistance heating, bypassing the compressor entirely for warmth generation.
If the compressor cycles on during heat mode, it indicates a potential wiring issue or a malfunctioning control board. Confirm your unit’s configuration; Amana offers both heat pump and non-heat pump PTACs. Consult the service manual and wiring diagram to verify correct operation. Incorrect operation suggests a professional assessment is needed to prevent further complications and ensure efficient heating.
Identifying Heat Pump vs. Non-Heat Pump Models
Distinguishing between Amana PTAC heat pump and non-heat pump models is vital for accurate troubleshooting. Heat pump models offer both heating and cooling via refrigerant cycle, while non-heat pump units rely on electric resistance heating for warmth. This difference significantly impacts compressor operation – heat pumps utilize the compressor in both modes, whereas non-heat pump compressors only run during cooling;
Model number nomenclature provides clues. Refer to Amana’s catalog and service manuals; specific codes within the model number indicate heat pump capability. If unsure, carefully examine the outdoor coil section. Heat pump units will have a larger, more complex outdoor coil. Confirming the type dictates the expected behavior and guides troubleshooting steps, especially concerning compressor activity during heating cycles.
Amana PTAC Model Number Nomenclature
Decoding Amana PTAC model numbers is crucial for identifying unit specifications and accessing the correct documentation. Amana’s system, like many HVAC manufacturers, embeds key information within the alphanumeric code. While specifics vary, the model number typically reveals the unit’s capacity (in BTUs or tons), configuration (single-phase or three-phase), and features like heat pump capability or voltage requirements.
Consulting Amana’s catalog is essential. The catalog provides a breakdown of each code segment, allowing you to pinpoint the exact model and its corresponding service manual. Understanding the nomenclature streamlines parts ordering and ensures you’re referencing the correct wiring diagrams and troubleshooting procedures. Accurate identification prevents misdiagnosis and costly errors during repair attempts.
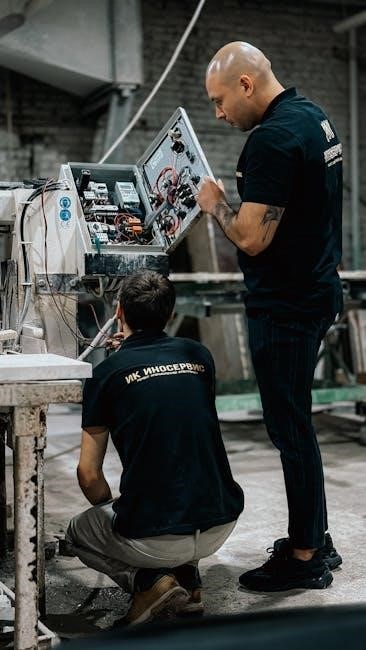
Using Photos & Manuals for Diagnosis
Combining visual inspection with detailed manuals significantly enhances diagnostic accuracy. High-resolution photos of the unit’s components – particularly the board, wiring, and capacitor – can reveal obvious signs of damage like burnt wires or bulging capacitors. These visuals, when cross-referenced with the service manual’s diagrams, pinpoint potential problem areas.
The service manual is your primary resource. It provides exploded views, wiring schematics, and troubleshooting flowcharts. Carefully compare the manual’s illustrations to your unit’s physical layout. Note any discrepancies. Utilizing both resources allows for a systematic approach, reducing guesswork and increasing the likelihood of a successful repair. Don’t hesitate to consult Amana’s catalog alongside the manual for clarification.
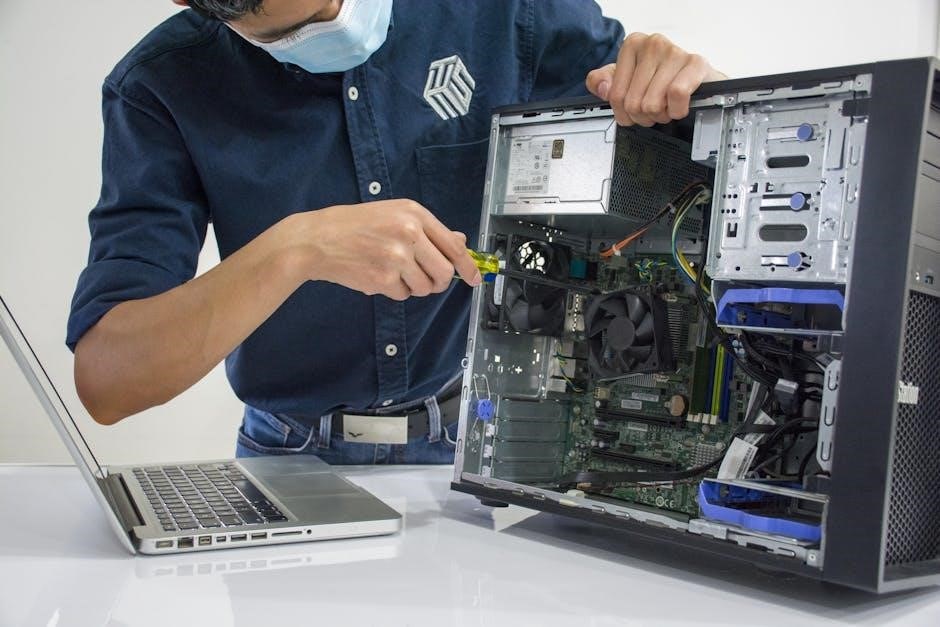
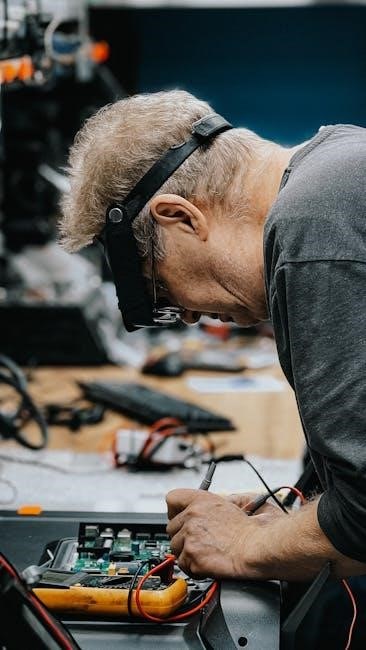
Electrical Troubleshooting Basics
Electrical issues demand caution and a systematic approach. Begin with a visual inspection, looking for frayed wires, loose connections, or signs of overheating. A standard screwdriver is essential for accessing components, while a multimeter is crucial for voltage and continuity testing. Always disconnect power before working on electrical parts!
Safety is paramount. Capacitors can retain a charge even after power-off, posing a shock hazard. Discharge them properly before handling. When testing, verify the multimeter is set to the correct range. Understand wiring diagrams – the service manual is key. If unsure about any step, consult a qualified electrician. Remember, improper electrical work can be dangerous and void warranties.

Essential Tools: Screwdriver & Multimeter
For basic Amana PTAC electrical diagnosis, two tools are indispensable: a screwdriver and a multimeter. A variety of screwdriver types (Phillips, flathead) are needed to access internal components safely. Ensure the screwdriver handles are insulated for added protection. The multimeter is your primary instrument for measuring voltage, resistance, and continuity – vital for pinpointing faulty wiring or components.
Selecting a multimeter with auto-ranging capabilities simplifies testing. Familiarize yourself with its functions and safety features. Always double-check the selected range before taking measurements. Proper use of these tools, combined with a service manual’s wiring diagram, empowers you to perform initial troubleshooting steps effectively and safely.
Safety Precautions When Working with Electrical Components
Working with electrical components demands utmost caution. Always disconnect power to the Amana PTAC unit at the breaker before commencing any inspection or repair. Even with the power off, capacitors can retain a dangerous charge – discharge them carefully using an insulated tool before handling. Avoid touching any exposed wires or terminals.
Wear appropriate personal protective equipment (PPE), including insulated gloves and eye protection. Never work alone; having someone nearby can be crucial in an emergency. If you’re uncomfortable or unsure about any step, consult a qualified HVAC technician. Remember, electricity is unforgiving; prioritizing safety prevents severe injury or damage to the unit.
Common Amana PTAC Error Codes (If Available)

Unfortunately, detailed, publicly available error code lists for all Amana PTAC models are often limited. Unlike larger HVAC systems, PTAC units frequently lack sophisticated self-diagnostic capabilities with extensive error code displays. However, some newer models may exhibit flashing LED patterns indicating general fault areas.
Consult your specific unit’s service manual – this is the primary source for any error code information. If no codes are listed, focus on symptom-based troubleshooting. Common issues manifesting without codes include fan failures, compressor problems, or thermostat malfunctions. Documenting the unit’s behavior before, during, and after a fault can aid diagnosis, even without a specific error code.
Considering Replacement Options
If repairs prove costly or impractical, evaluating replacement is prudent. PTAC units, particularly smaller 9K models, can sometimes be more expensive to fix than replace, especially during peak HVAC service demand. Consider the age of your unit; older models may lack energy efficiency features found in newer versions, leading to higher operating costs.
Compare the cost of a new PTAC against personal air conditioning units (window or portable). While PTACs offer through-wall installation, personal units are often cheaper upfront. Temporary solutions, like a portable AC, can bridge the gap while you decide. Factor in installation costs and long-term energy savings when making your final decision.
Cost Comparison: PTAC vs. Personal Units
Evaluating the financial implications of replacement requires a detailed comparison. A new 9K BTU PTAC unit can cost upwards of $950, but prices fluctuate. Conversely, window AC units and portable air conditioners are generally significantly cheaper, often available for under $500, making them attractive short-term solutions.
However, consider the long-term costs. PTACs offer a more permanent, integrated solution, potentially increasing property value. Personal units require window space or floor space and may be less energy-efficient. Installation costs for a PTAC (sleeve, wiring) must be factored in, potentially adding $100-$300 to the overall expense. Weigh these factors carefully to determine the most cost-effective option.
Temporary Solutions While Considering Replacement
Facing a malfunctioning Amana PTAC while evaluating replacement options? Several temporary solutions can provide relief. A portable air conditioner offers immediate cooling, though potentially less efficiently than a PTAC. Window AC units are another viable option, provided you have a suitable window and electrical outlet.
For heating, electric space heaters can offer localized warmth, but exercise extreme caution regarding fire safety – never leave them unattended. Prioritize safety and energy conservation when using these alternatives. Remember these are short-term fixes; addressing the root cause with a repair or replacement remains crucial. Thoroughly research PTAC models and quotes during this interim period to make an informed decision.